
Twitch VOD Downloader & Archiving Rules 2026: Save & Record Streams
Summary: Navigate the 2026 Twitch VOD rules with an expert digital archivist. Learn how to save your Twitch streams natively, bypass DMCA muted audio via lossless capture, and execute Cookie Authorization to download sub-only archives in 1080p.
During my recent archiving stress test covering a major week-long esports tournament, I monitored how Twitch's backend manages video chunks. Many users were frustrated because their local capture setups resulted in the dreaded "Black Screen of Death," a direct consequence of browsers heavily enforcing Hardware Acceleration Bypass protocols.
As a digital archiving expert who deals with gigabytes of raw stream data daily, I've had to restructure my entire workflow. The old methods of scraping m3u8 playlists blindly no longer work efficiently against Twitch's latest API rate limits and the newly enforced 100-hour account highlight cap.
Disclaimer: The tools and techniques described below are strictly for personal, time-shifted offline viewing. Bypassing platform limitations must fall under fair use for personal backup. Always respect creator permissions, refrain from circumventing DRM protocols for piracy, and adhere closely to the streamfab copyright and usage guidelines as well as regional copyright mandates.

Twitch Stream Archiving Matrix (2026)
For users wondering, are twitch streams saved indefinitely? The definitive answer is no. Twitch employs an automatic pruning script based on your account tier, treating standard Video on Demand (VOD) as highly perishable server cache rather than permanent storage.
Understanding how long are twitch clips kept compared to full broadcasts is critical. While manually trimmed short clips can theoretically persist, full stream replays follow a rigid expiration schedule in 2026:
- • 7 Days Transit: Standard user accounts completely wipe full VODs after a week.
- • 14 Days Buffer: Active Twitch Affiliates gain a microscopic extension.
- • 60 Days Maximum: Twitch Partners, Turbo, and Prime members max out at two months.
Furthermore, the legacy loophole of converting an entire broadcast into a "Highlight" to dodge expiration has been permanently patched. Twitch now strictly enforces a 100-hour cumulative storage limit for highlights and uploads. Once you hit 100.1 hours, the oldest chunks are automatically purged without recovery options. This forces both viewers and creators to adopt localized redundancy plans.
Native VOD Configuration for Creators to Save Twitch Streams
If you are broadcasting and wondering how to archive twitch streams before the server nukes them, you must explicitly enable server-side caching. Twitch disables automatic VOD generation by default for new accounts to save server bandwidth. Activating this is your first layer of defense.
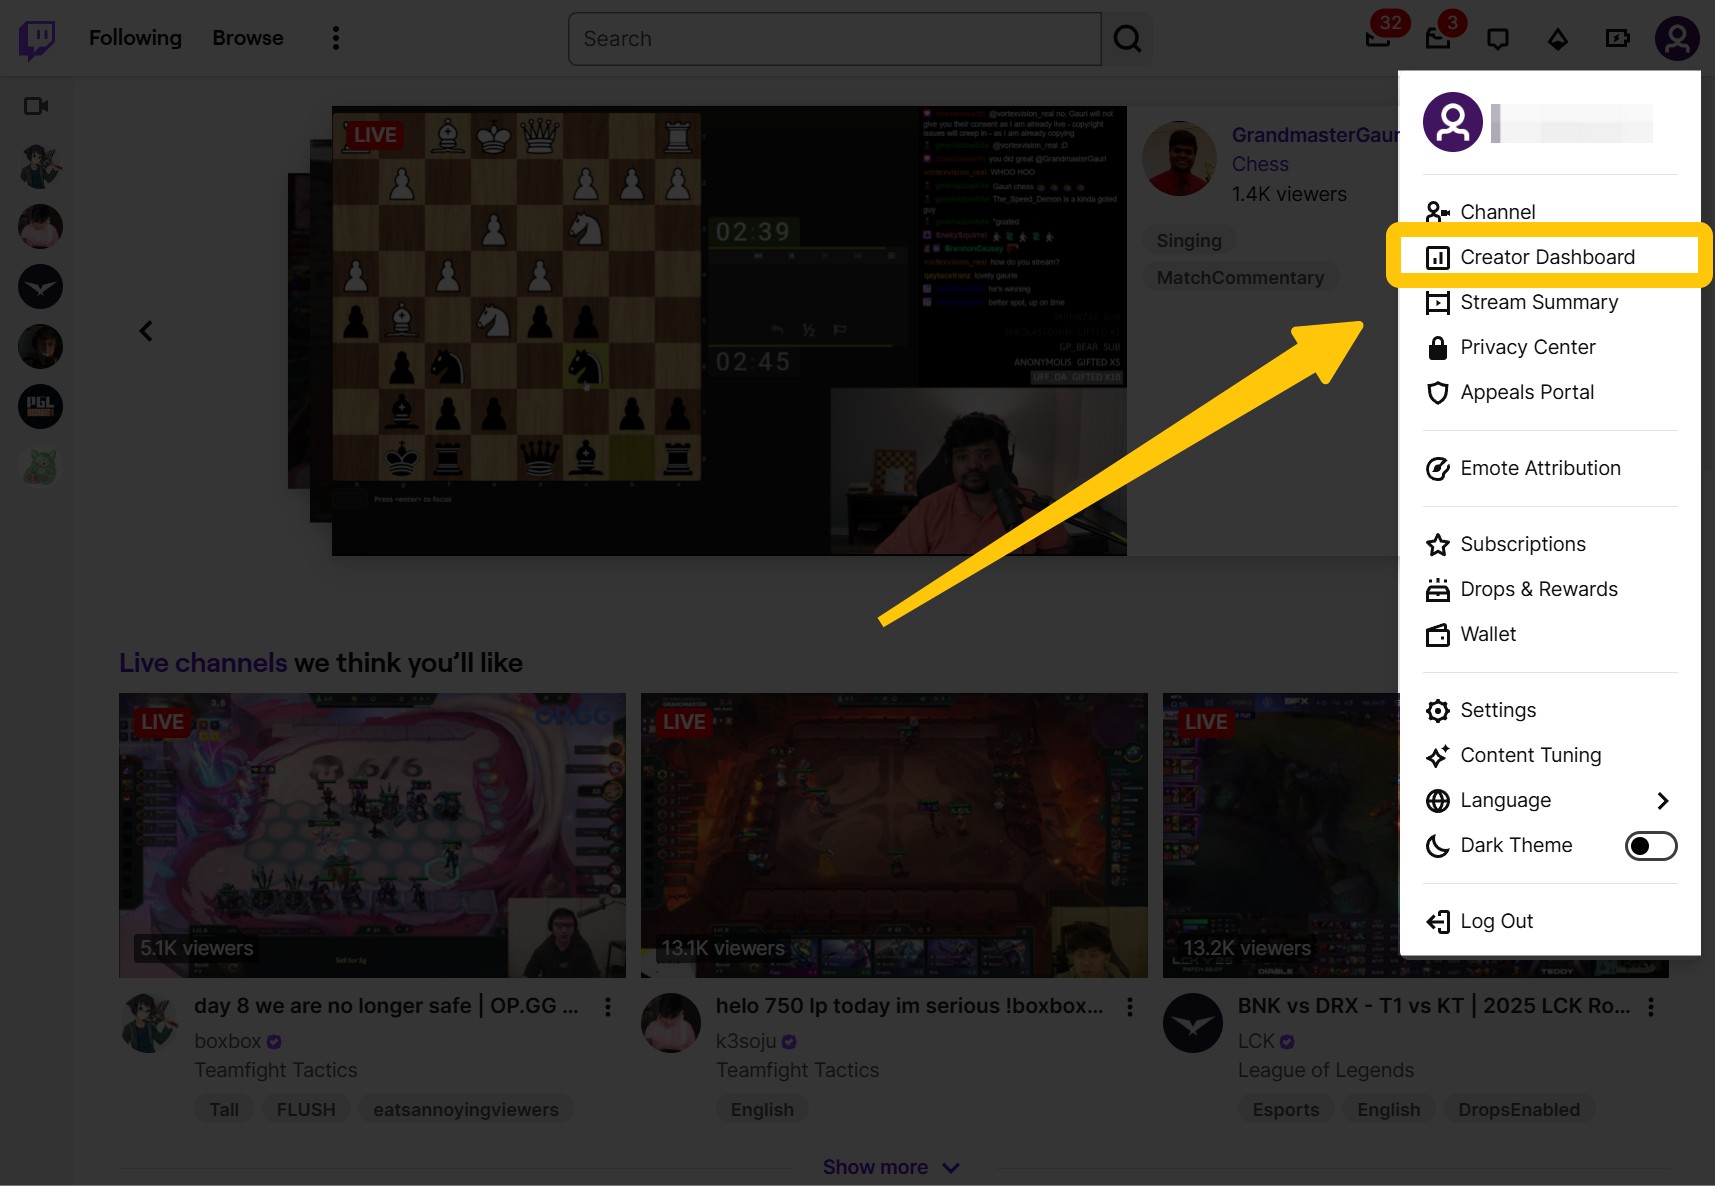
Step 1: Log into the Twitch Creator Dashboard. Navigate to the top right profile dropdown.
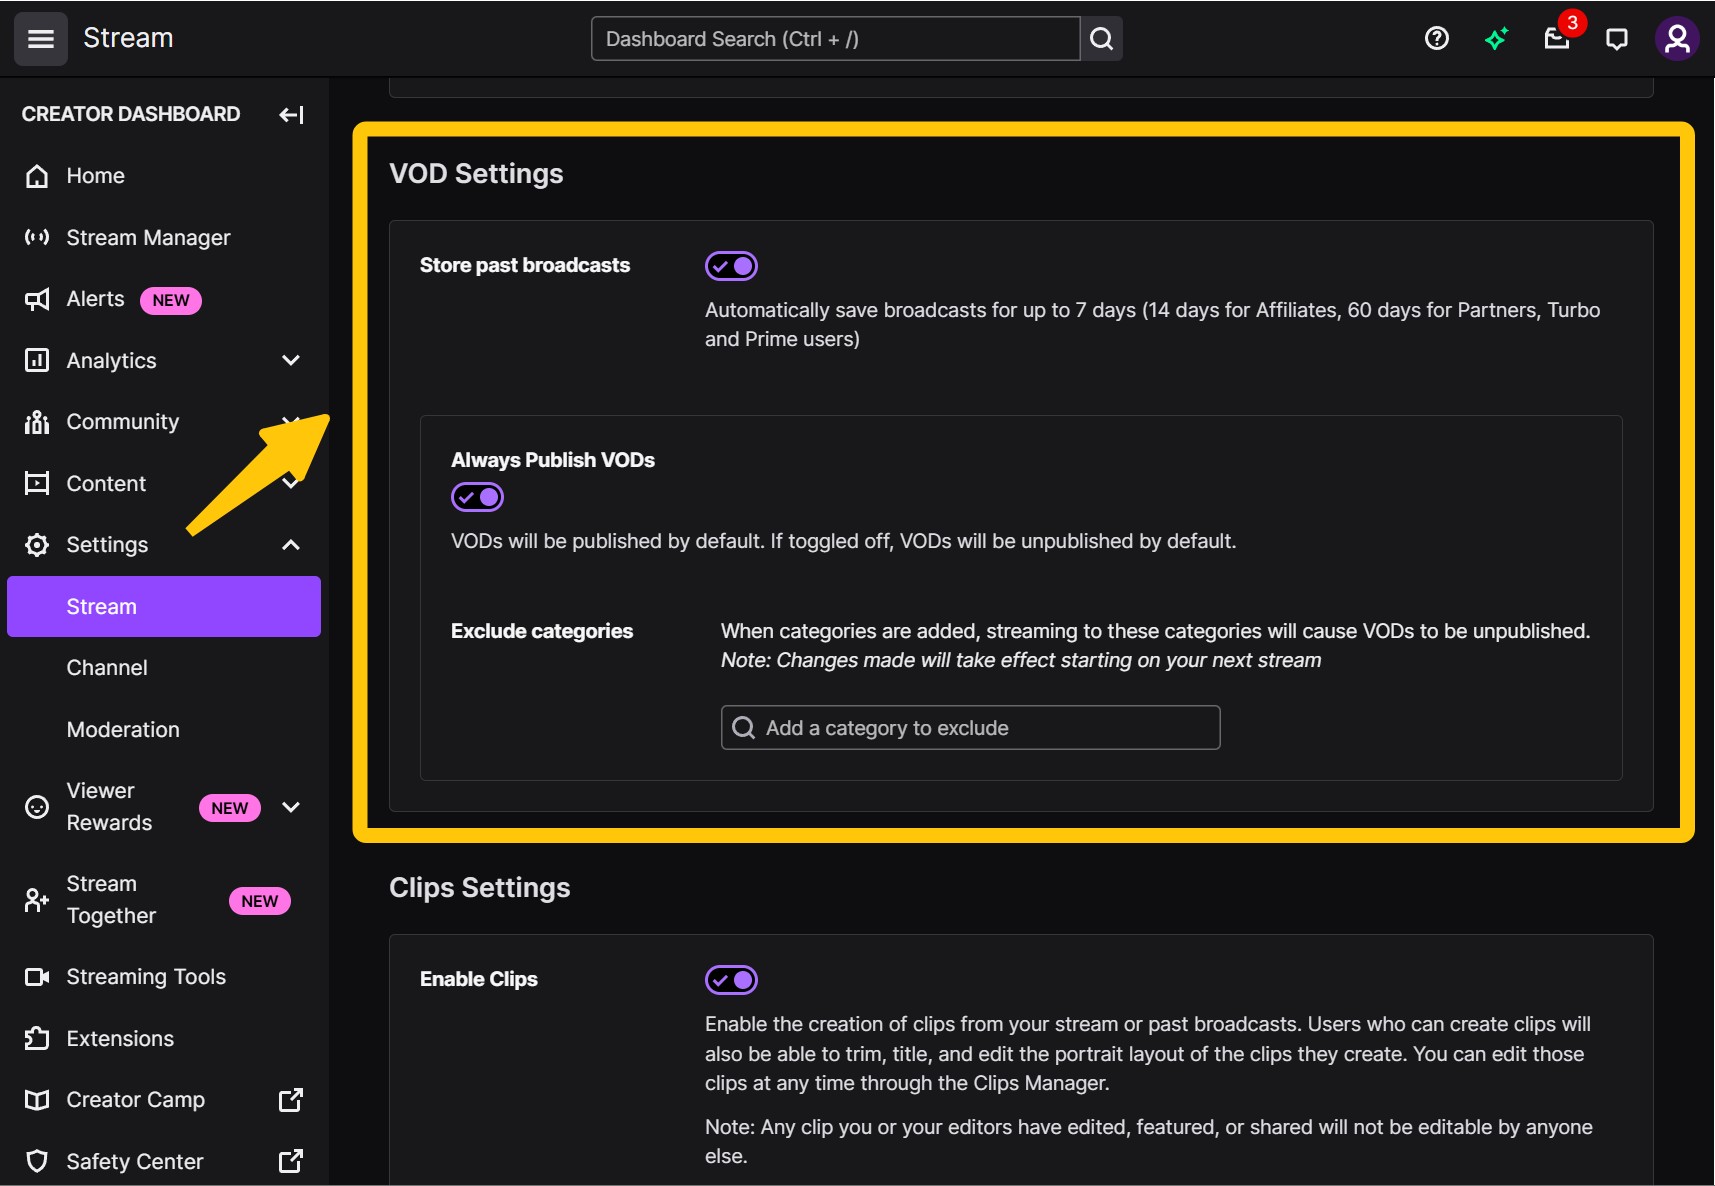
Step 2: Go to Settings > Stream. Scroll to the "VOD Settings" module and toggle "Store past broadcasts" to active.
Pro Tip for Creators: While the Twitch VOD server stores your replay, it undergoes severe bitrate compression. For a 1:1 Bitstream archival, I always run an OBS local recording concurrently using NVENC (if you have Nvidia hardware). This circumvents the platform's compression and guarantees you have an untampered master file even if your live network drops.
Viewer Archiving Tools & Tactics to Save Twitch Streams
As a viewer seeking how to download twitch stream archive files locally, you can no longer right-click code elements. Standard browser extensions fail completely when encountering dynamically injected HLS streams. Before recommending my curated 2026 toolkit, here is a technical baseline comparison I built during my recent workflow audits.
| Archiving Method | Metadata & Format | Sub-Only / Protected Access | Best For |
|---|---|---|---|
| StreamFab | 1080p60 / MP4 / AAC 2.0 | Supports Cookie Authorization | Lossless post-stream VOD library building. |
| RecordFab | Auto Frame Rate / MP4 | Bypasses Hardware Acceleration blocks | Capturing live streams & evading DMCA Muted Audio. |
| YT-DLP (CLI) | Raw MKV extraction | High failure rate with CAPTCHAs | Programmers using headless server automation. |
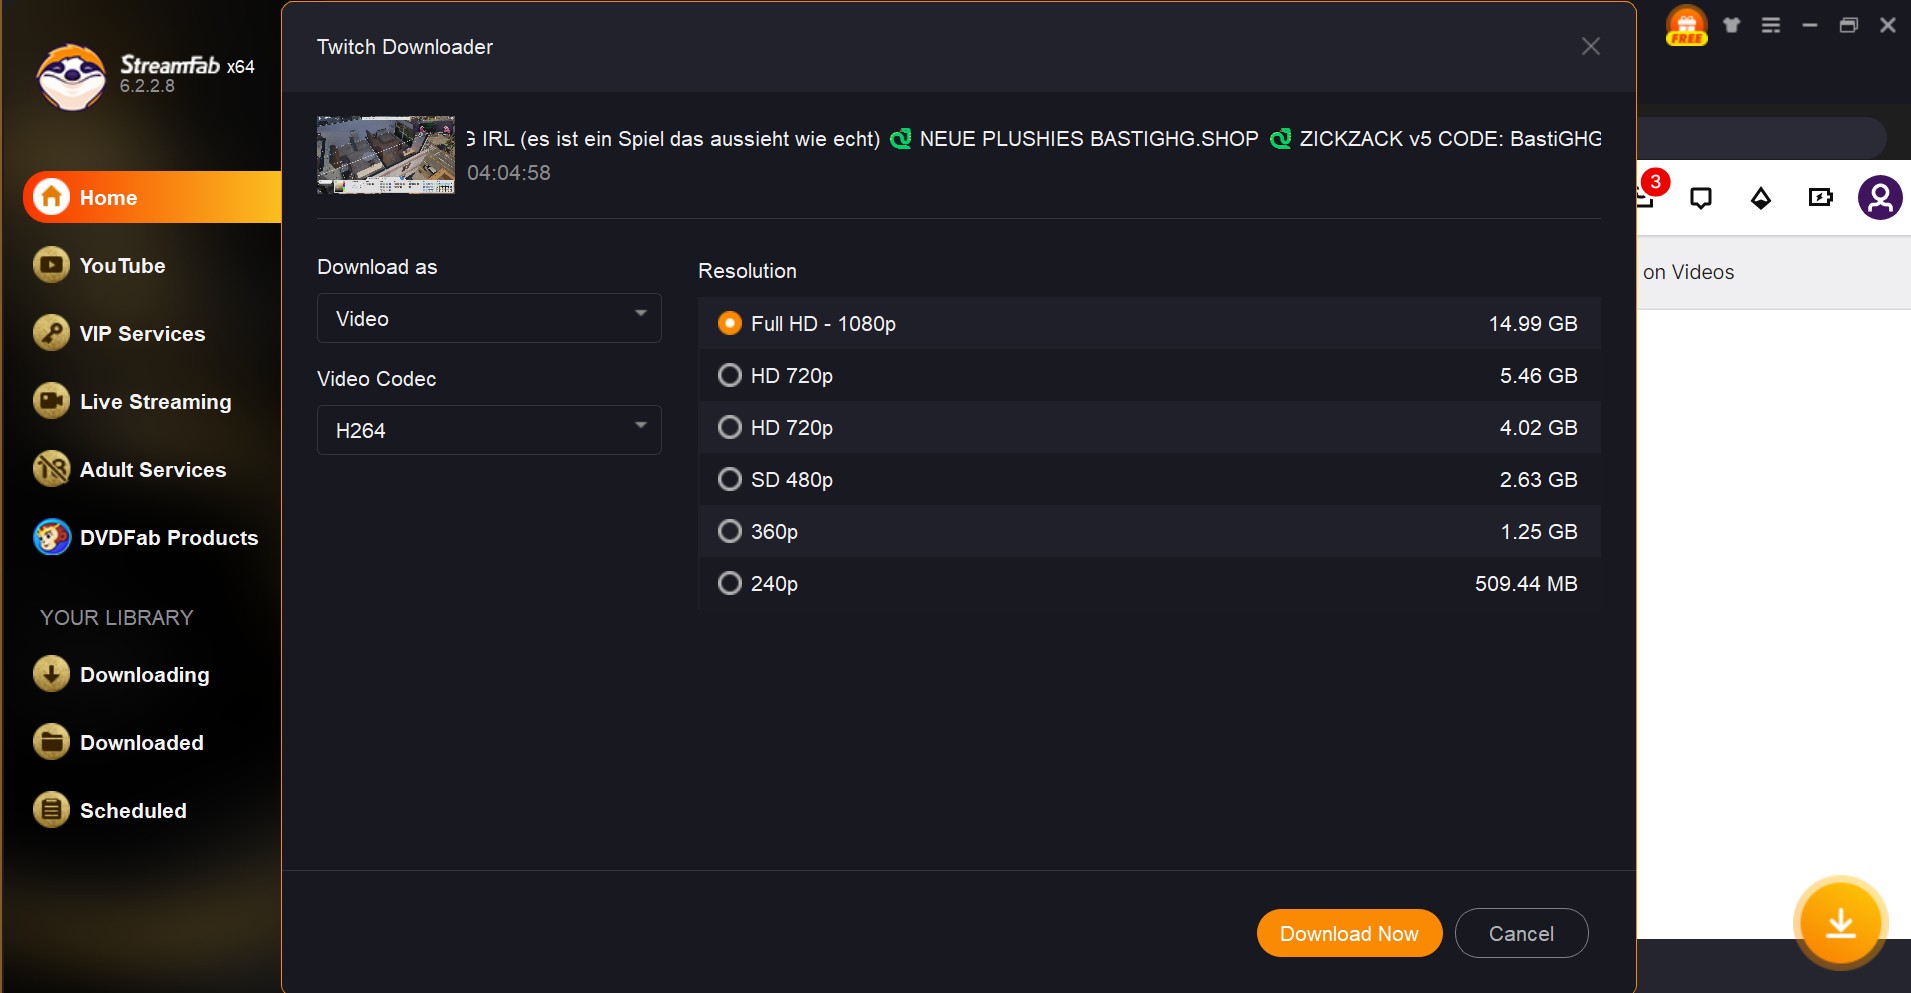
StreamFab: Lossless VOD Retrieval
Screen-recording a 4-hour VOD is an archaic waste of CPU cycles and inevitably results in frame drops. When I want to download streaming video, I need direct access to the server's video container. StreamFab achieves this by analyzing the raw HLS streams and remuxing them locally into a standardized format, allowing you to convert Twitch clips to MP4 seamlessly.
Crucially, it handles Cookie Authorization natively. Many top-tier creators lock their VODs behind a "Sub-only" paywall. Standard command-line downloaders fail the authorization handshake. StreamFab's built-in Chromium engine lets you log in organically with your subscriber account, passing the secure OAuth token to the downloader without triggering bot-protection CAPTCHAs.

- Parses Twitch HLS playlists into lossless 1080p, 60fps local files with AAC 2.0.
- Executes flawless Cookie Authorization for capturing Sub-only VODs you subscribe to.
- Remuxes the data stream directly to MP4/MKV without CPU-heavy screen capturing.
- Batch queues entire tournament playlists for unattended overnight download.
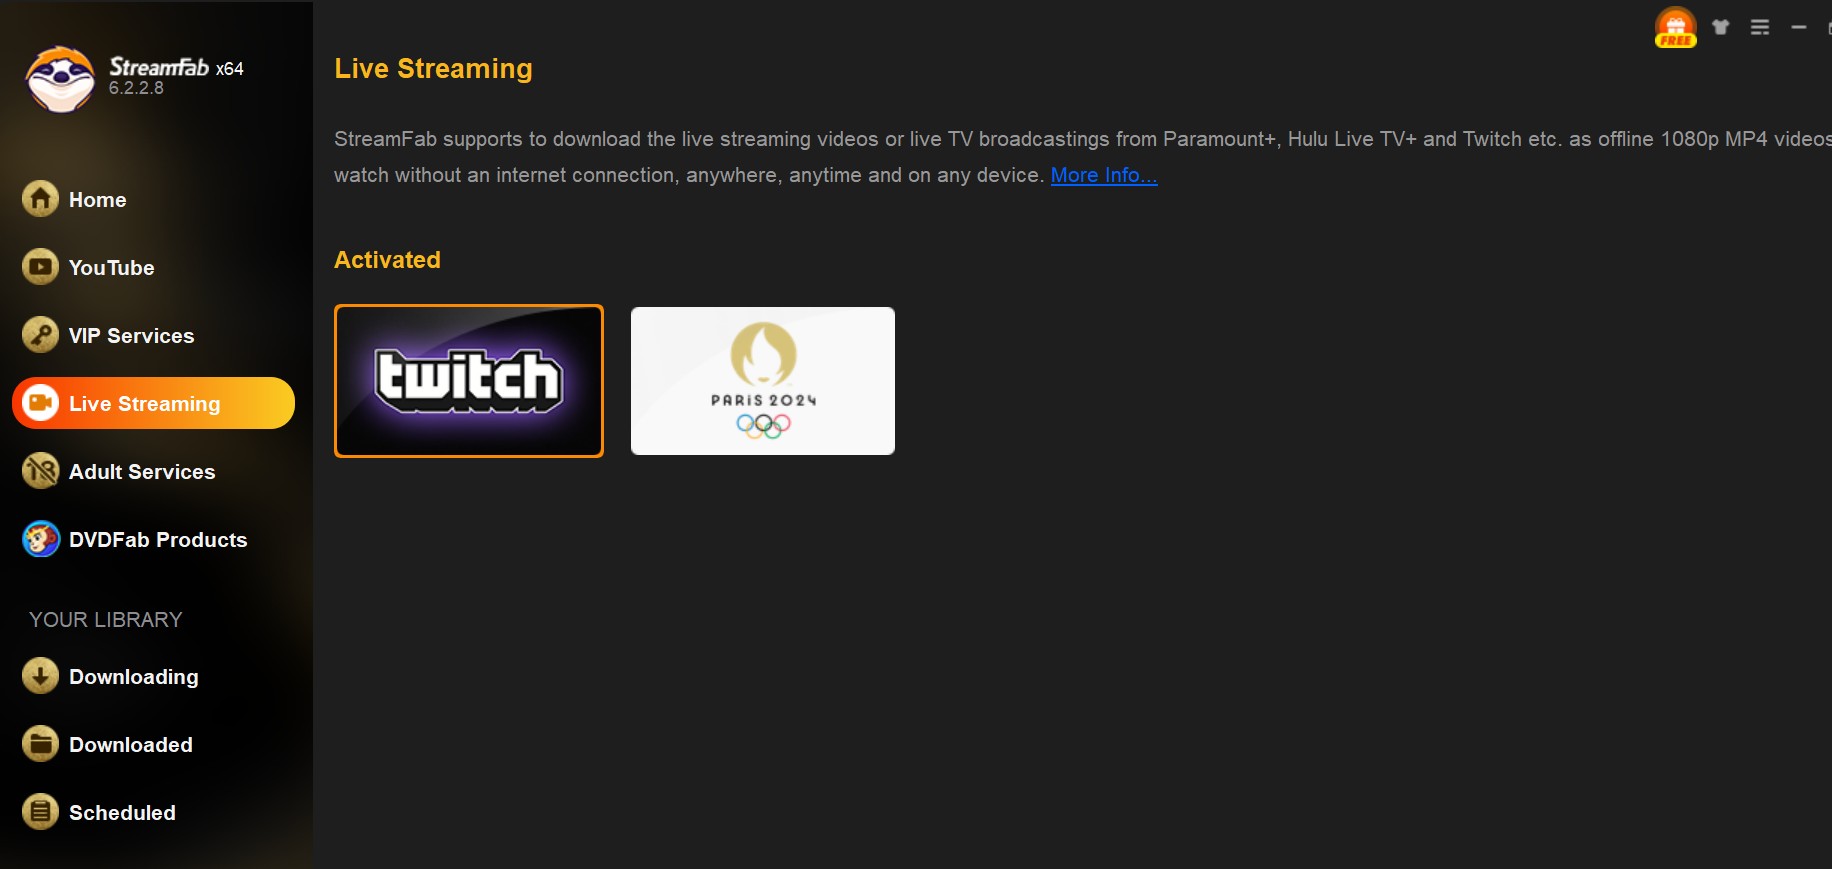
Step 1: Launch StreamFab, navigate to the "Live Streaming" module, and initialize the Twitch environment.
Step 2: Authenticate your user credentials. This is vital if you intend to index sub-only content. Open the target video page.
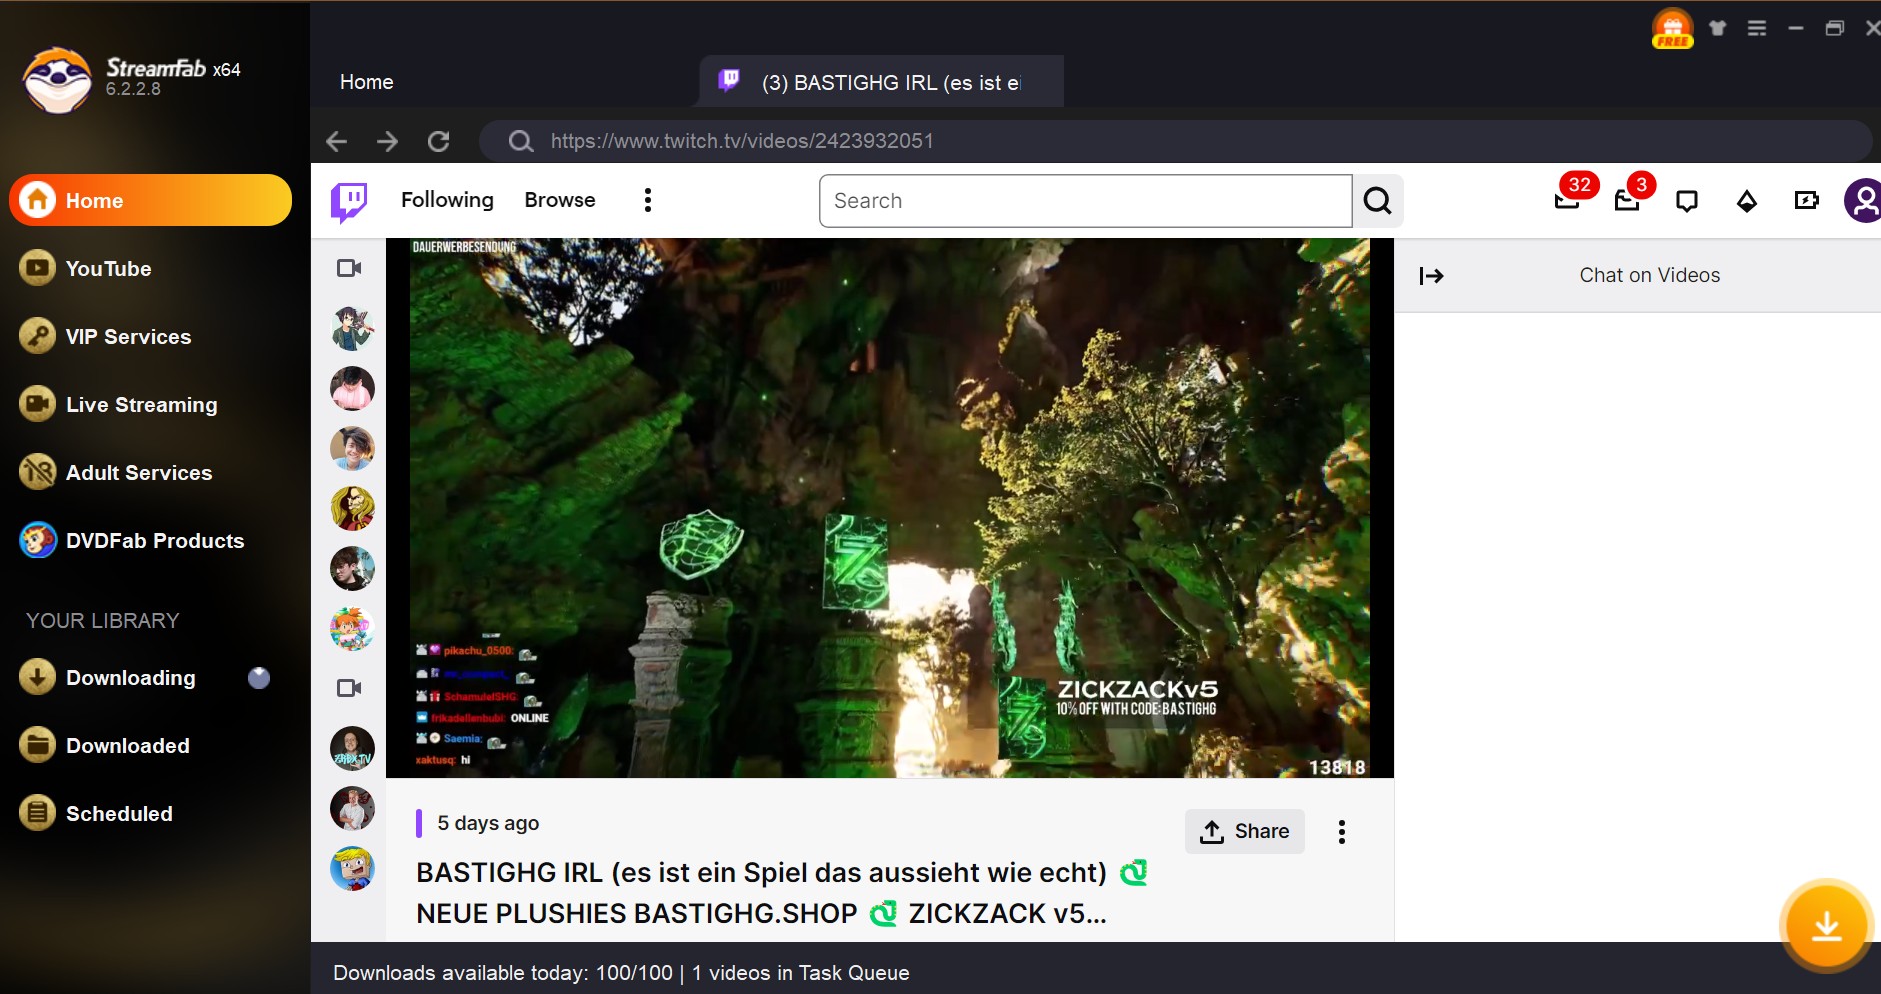
Step 3: The software intercepts the stream data automatically. Select your codec (H.264 is safest for compatibility) and queue the download.
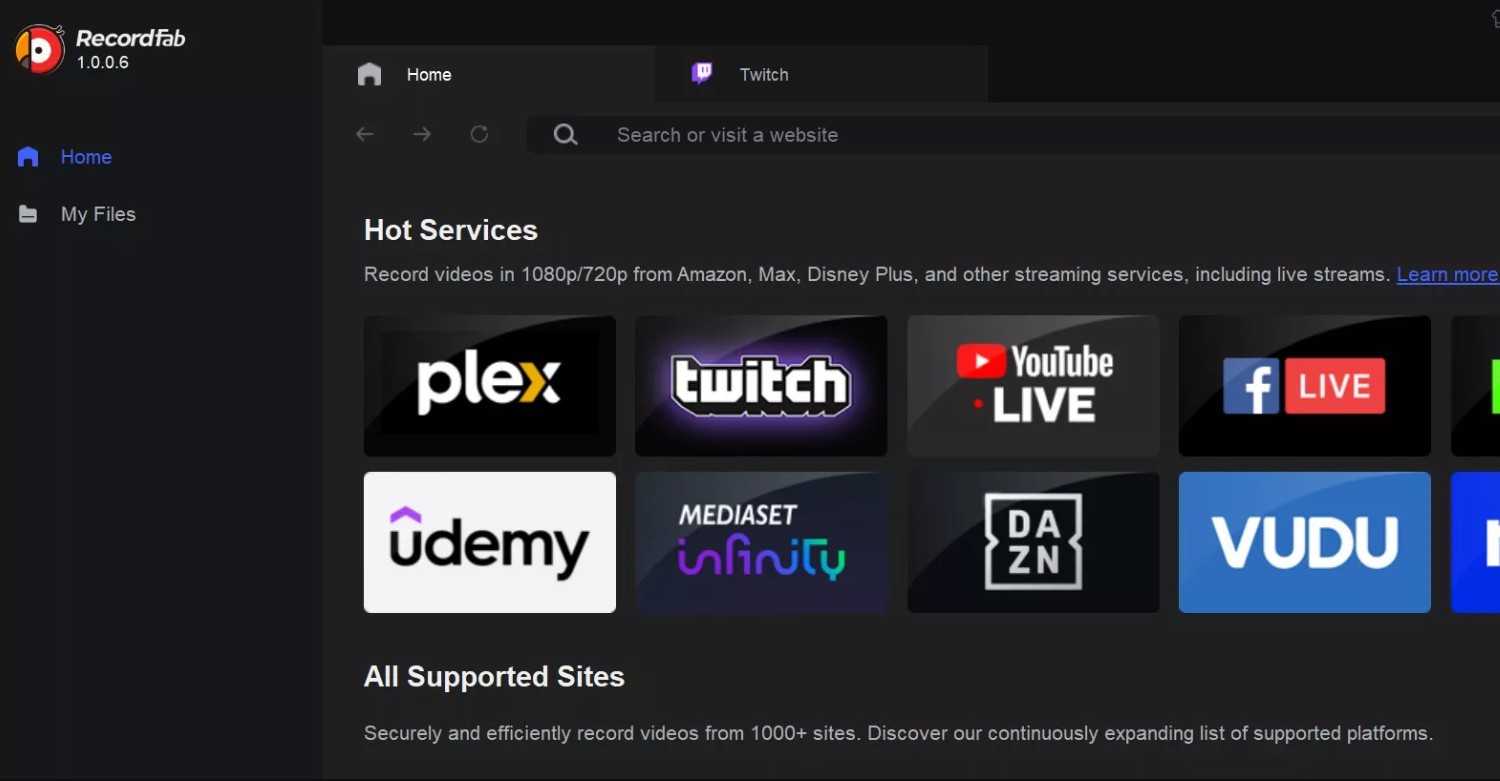
RecordFab: Live Capture Strategy
If you wait for the stream to end, you run a high risk of encountering DMCA Muted Audio blocks. Twitch's algorithm aggressively scrubs copyright music in post-stream processing, leaving your retrieved VOD with dead silence. To combat this, I record streams live as they broadcast.
However, recent updates to Chromium-based browsers enforce strict Hardware Acceleration policies, throwing a black screen when third-party software attempts to hook into the video layer. RecordFab solves this by capturing directly via its accelerated internal browser pipeline, bypassing external GPU compositing conflicts.
- Grabs live audio pipelines prior to Twitch's server-side DMCA muting scripts.
- Bypasses strict Hardware Acceleration blockades that plague traditional screen recorders.
- Internal browser structure prevents desktop pop-ups/notifications from bleeding into the footage.
Step 1: Fire up RecordFab and log in. The isolated environment ensures zero interference from your primary desktop usage.
Step 2: Once the live stream URL is loaded, wait for the video detection trigger in the lower tray before hitting record.
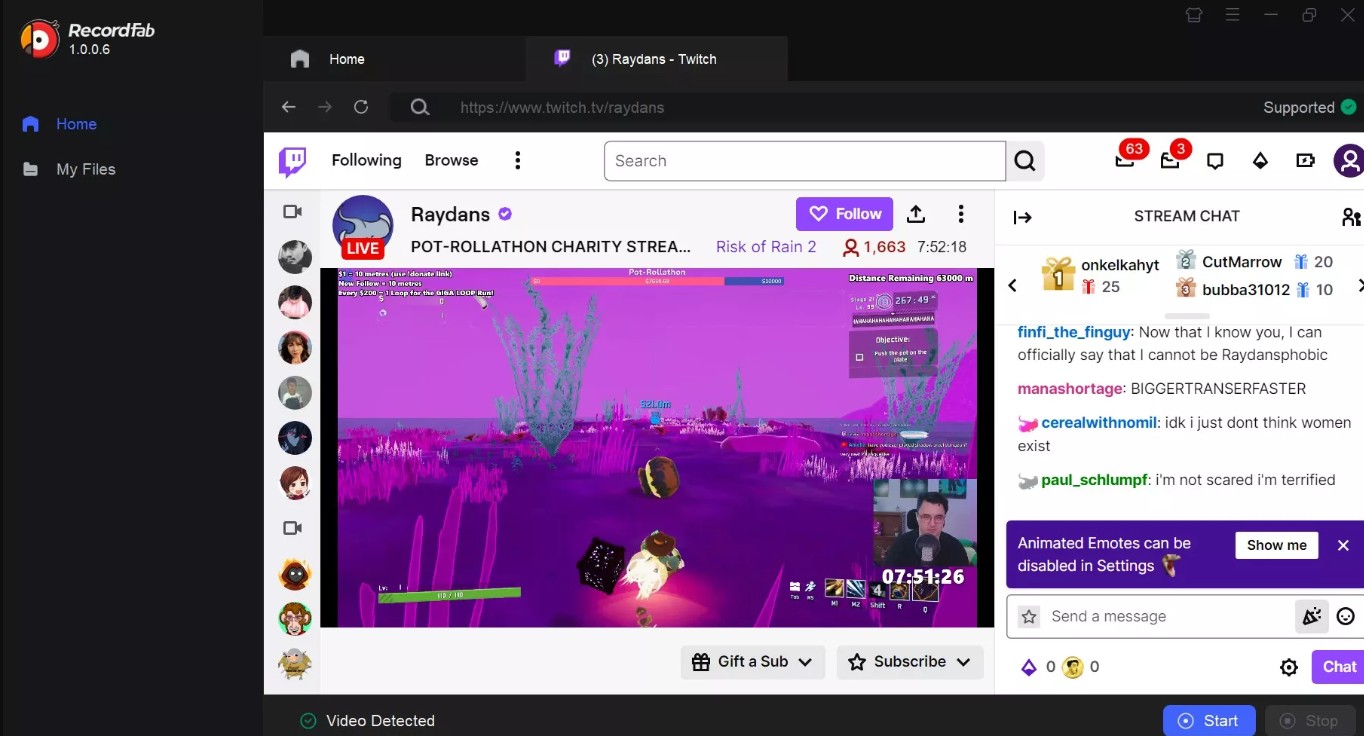
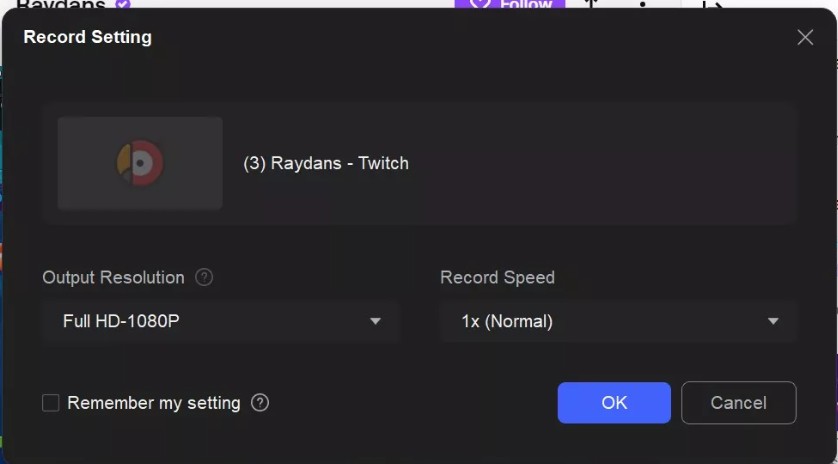
Step 3: Select 1080p and verify your hardware encoding is active to keep CPU utilization minimal during long live sessions.
Post Twitch Stream Management: Deletion & Cleanup
With the 100-hour ceiling hanging over accounts in 2026, understanding how to delete twitch saved streams efficiently prevents essential highlights from being purged randomly. You must routinely clean out your Video Producer dashboard.
Navigate to Video Producer under your Creator Dashboard. Filter by "Past Broadcasts" or "Highlights". Check the bulk-action boxes on the left side of redundant files, click the universal "Delete" icon at the top, and manually confirm. I automate this cleanup every Sunday right after completing my local hard drive syncs.
FAQs
How to Download Sub-Only Twitch Streams Legally?
If you are a paying subscriber to a channel, you possess legitimate ephemeral access to their VODs. To archive Sub-only content locally for personal use without triggering bans, you must use software utilizing Cookie Authorization (like StreamFab). This mimics your exact browser state, passing your active OAuth token to decrypt the hidden HLS manifest without relying on prohibited third-party proxy scripts.
Why I Get Muted Audio in Twitch VODs?
Once a VOD processes into the Twitch server vault, DMCA flagged audio chunks are permanently stripped—saving that VOD post-stream will yield silent sections. The only definitive bypass strategy is establishing a live capture (via RecordFab or OBS application audio routing) while the broadcast is happening, grabbing the incoming bitstream before Twitch executes its post-processing audio destruction.
What are the Default Formats for Saved Twitch Broadcasts?
Twitch natively chunks its streams into .ts files orchestrated by an m3u8 playlist. When you extract these archives through a downloader, they are remuxed natively into MP4 or MKV containers utilizing the H.264 video codec and AAC audio codec. This ensures universal playback compatibility with media servers like Plex, avoiding the need for heavy on-the-fly transcoding.
Why Do I Get a Black Screen When Recording?
Standard screen capture tools fail due to your browser's Hardware Acceleration (GPU rendering) conflicting with the capture injection. The video layer is isolated by the OS for efficiency. To fix this instantly, either disable Hardware Acceleration in Chrome/Firefox settings (which increases CPU heat), or route the capture through a dedicated internal-browser software designed to bypass GPU compositing locks.
Conclusion
As a seasoned digital content archivist, my methodology relies strictly on redundancy. Trusting platform servers to preserve digital culture is a guaranteed path to data loss, especially with aggressive 100-hour limits and retroactive DMCA scrubbing policies dominating 2026.
For pristine metadata and organizing offline libraries, StreamFab remains the absolute benchmark because its protocol-level downloads preserve the original 1080p source code without re-encoding loss. However, if you are targeting chaotic live streams where audio mutations or sudden takedowns are a threat, running RecordFab live is non-negotiable.
Unlike a service like YouTube, which facilitates downloading videos to watch them in offline mode, Twitch doesn't offer you the offline option. But now it's possible to save Twitch clips offline. Now you can convert Twitch clip to MP4 and save them offline using multiple methods. Stay tuned to learn more about them.
By Nicole Lopez - Mar 17, 2026