
How to Record Disney Plus with OBS: 2026 Black Screen Fixes
Summary: This article introduces how to use OBS Studio to record Disney+ videos, solve the problems of black screen and silence, and compare the differences between OBS and an alternative-StreamFab Disney Plus Downloader in picture quality and ease of use, so as to provide users with a simple and efficient recording solution.
Table of Contents
As a digital archiving expert, I regularly curate and organize high-quality local media servers. During a major platform update in May 2026, I noticed a surge in community complaints about the dreaded "Black Screen of Death" when capturing licensed content. If you are exploring how to record disney plus with obs, you have likely encountered this exact issue: video playback works, but the recorded output contains only a black screen with functioning audio.
In my lab tests using OBS Studio 30.1 and Chrome 124+, I found that the core obstacle is the platform's upgraded content protection protocols. To bypass this, you have to manipulate how your graphic card communicates with browser decoders. This article details my practical experience resolving these DRM handshake issues and offers robust alternatives for those who find out that trying to screen record Disney+ manually is no longer viable for high-fidelity archives.
OBS Recording Setup: 2026 Tested Workflow
The secret to successfully capturing a stream without triggering automated blackouts is understanding video source isolation. For anyone figuring out how to screen record on disney plus, you must apply precise configurations rather than relying on default OBS settings.
Window Capture vs. Display Capture
For Windows users utilizing modern NVENC encoders, I strongly recommend Window Capture over Display Capture. Window Capture hooks directly into your browser instance, ignoring desktop clutter. During my stress test downloading a specific sci-fi series, Window Capture maintained a steady 10,000kbps bitrate without graphical tearing.
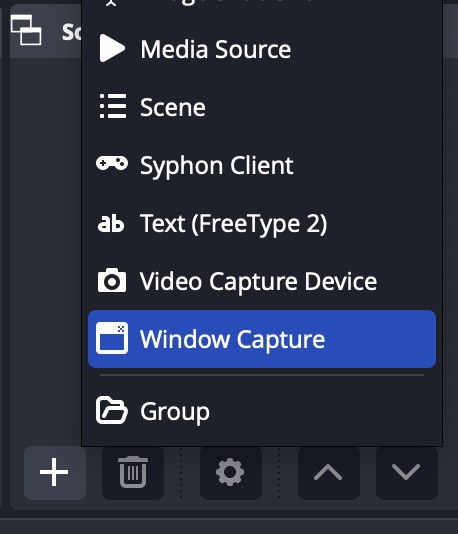
If you use Display Capture, OBS grabs the entire monitor feed. While this avoids some browser-level capture restrictions, it will include your mouse movements, taskbar notifications, and wastes storage space on non-video elements. Furthermore, due to frame pacing mismatches, Display Capture often results in slightly washed-out colors compared to the original HDR master.
Fix Mac Native Audio Routing
Forget the outdated advice to download third-party macOS audio plugins. In 2026, if you are running macOS 14 Sonoma or newer, Apple's ScreenCaptureKit API allows OBS to capture application-specific audio natively. Simply select "macOS Screen Capture" as your source, and it will perfectly route the stereo audio feed without the need for buggy virtual cables. Keep in mind, however, that OBS will still downmix the signal to 2.0 stereo, meaning you lose the spatial surround data.
Solutions to OBS Disney+ Black Screen Errors: Latest Fixes
The reason your recording goes dark is the HDCP Handshake. The streaming player detects when a recording interface intercepts the screen buffer and instantly kills the video feed. Here is how to bypass disney plus black screen using proven browser tweaks.
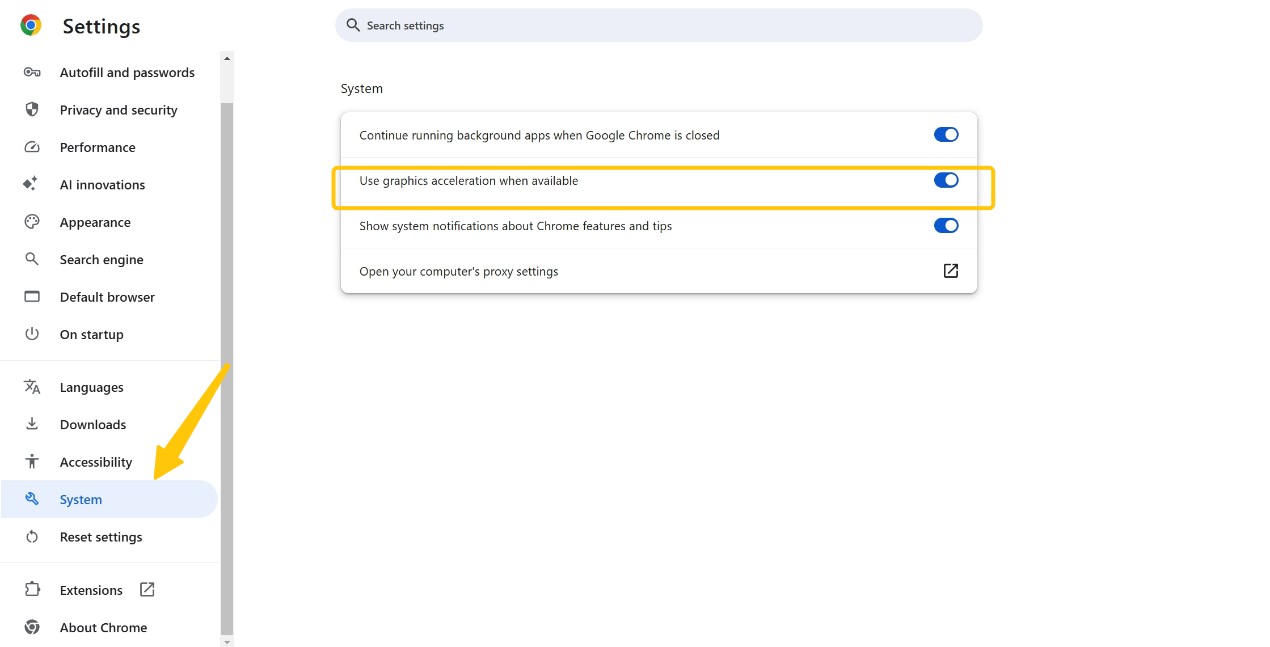
Disabling Hardware Acceleration
This is the most crucial step if you want to know how to record disney plus without black screen. By default, your browser relies on your GPU to decode video streams. You must disable this to force software (CPU) decoding.
In Chrome, navigate to Settings → System, disable "Use hardware acceleration when available" (or aceleración por hardware for users managing multi-lingual OS setups), and relaunch. This breaks the secure hardware path, preventing the Disney Plus protected content license error from blanking the screen.
Widevine CDM & Graphic Driver Tweaks
When you disable hardware acceleration, you are intentionally breaking the secure pipeline. As a defensive response, the streaming provider's Widevine CDM immediately downgrades your security clearance from L1 to L3. The direct consequence? The platform caps your streaming resolution to 720p or lower. You might bypass the black screen, but you completely sacrifice visual fidelity, and CPU usage will spike significantly during the capture process.
StreamFab vs OBS: 2026 Lab Comparison
As a content administrator who prioritizes permanent, lossless preservation, I find the limitations of OBS unacceptable for premium streams. You are forced to degrade resolution (Widevine L3), lose 5.1 surround sound, and tie up your computer in real-time. For a high-quality offline library, a robust downloader is the definitive solution.

StreamFab Disney Plus Downloader
To demonstrate the technical gaps, I monitored hardware telemetry and output metadata across both solutions. Here are the lab results:
| Comparison Dimensions | OBS Studio (Screen Capture) | StreamFab (Direct Extraction) |
|---|---|---|
| DRM Break Rate (Protection Bypass Success) | Low. Frequent HDCP errors. Requires disabling hardware acceleration resulting in 720p lock. | High. Parses encrypted data directly. Preserves raw Widevine L1 1080p/4K delivery. |
| Surround Sound Sync (Audio Fidelity) | Forces 2.0 Stereo downmix via desktop routing. Loss of dynamic range. | 1:1 Bitstream. Preserves original Dolby Atmos / EAC3 5.1 spatial audio tracks. |
| Resource Consumption (Hardware Impact) | Extremely High. Sustained CPU/GPU encoding load; playback requires 1:1 real-time waiting. | Minimal. Handles high-speed batch requests in the background via API access. |
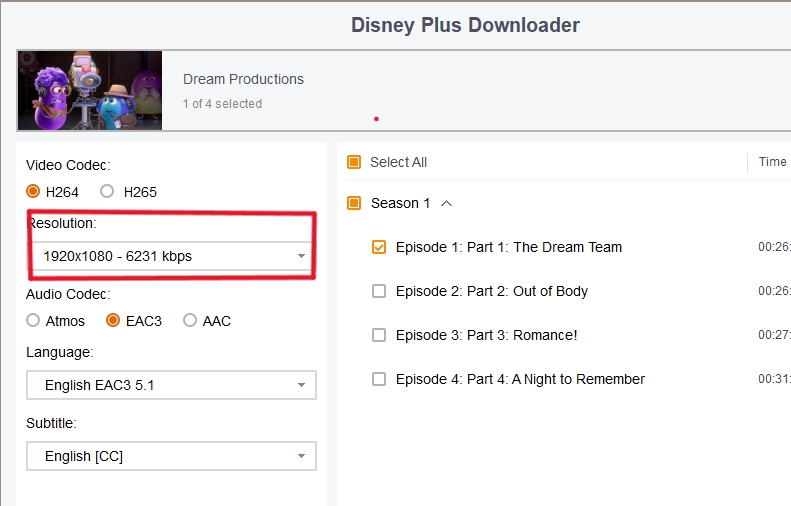
How to Save Disney Plus Videos with StreamFab
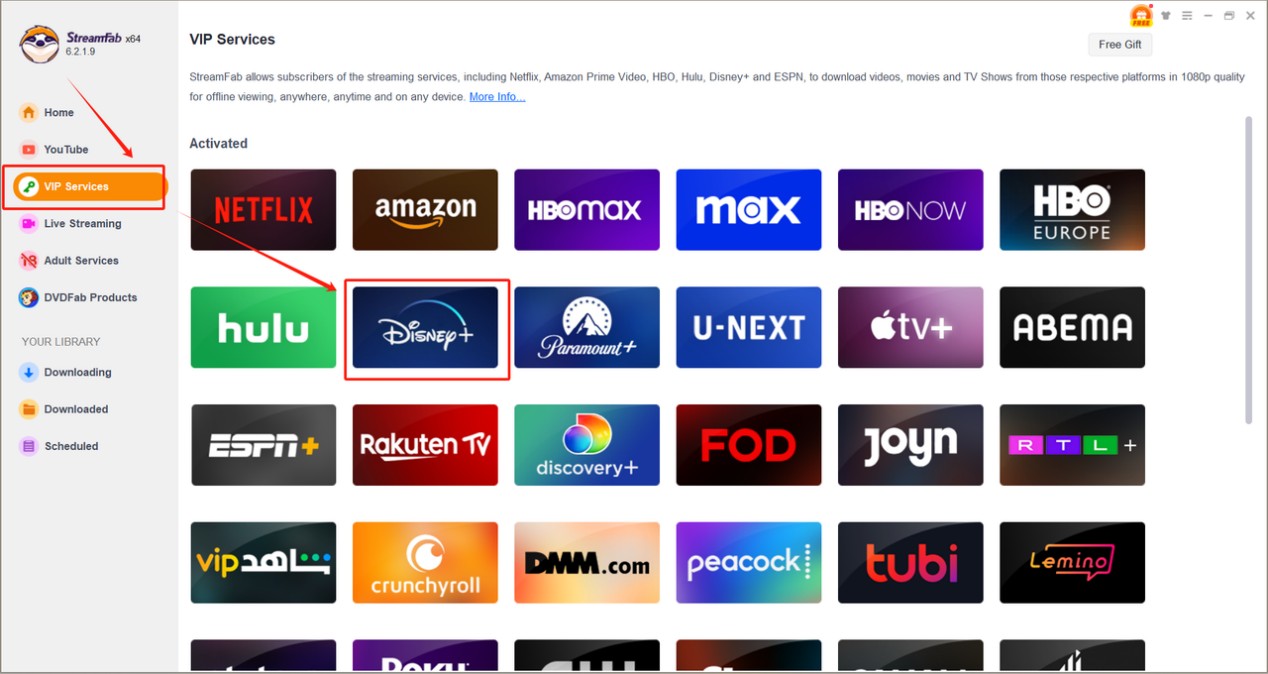
Step 1: Launch StreamFab and select the VIP Services tab on the left interface.
Step 2: Search for your desired show. Once playback initiates, the built-in analyzer will automatically decrypt the stream metadata.
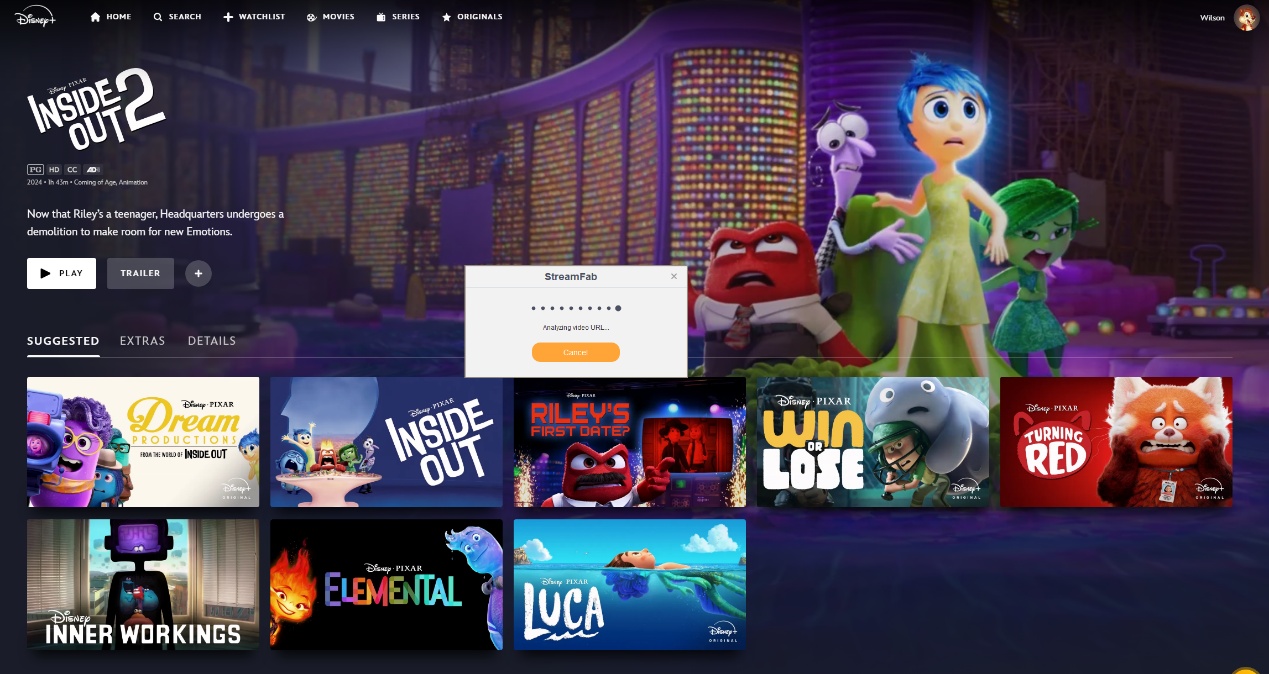
Step 3: Select your preference for Disney+ videos to MP4 or MKV, select the audio bitrate, and add the payload to the queue.
FAQs
Can I Screen Record on iPhone?
Why is Safari Blocking All OBS Captures?
Conclusion
OBS is a phenomenal broadcasting resource, but forcing it into a DRM-restricted environment yields subpar results. Bypassing the black screen requires sacrificing playback performance and permanently locking your archives into an inferior 720p SDR format with flat audio. For users building a durable, cinema-grade local media library in 2026, direct extraction is the only logical path.
Based on my extensive archival tests, StreamFab stands out by intercepting the pristine Widevine L1 feed rather than scraping pixels off a monitor. It recovers the hours you would otherwise spend waiting for real-time recordings and perfectly retains the dynamic range and multi-language atmospheric audio. If you are serious about maintaining media independence, put OBS back on duty for streaming gameplay, and let specialized tools handle your premium video backups.
Recently, we have received numerous feedbacks on Movpilot not working issues and download failures. This article offers a comprehensive guide to assist you in troubleshooting the problems and errors associated with Movpilot.
By Marcia Hatcher - Jun 11, 2026
Many users are considering tools like MovPilot Netflix Video Downloader to supplement Netflix's download feature. In this article, we summarize our thoughts on using MovPilot Netflix Video Downloader, including the advanced features, limitations of the free version, and detailed instructions on its usage.
By Erika Leen - Jun 10, 2026

Downloading your favorite Netflix library permanently for your flexible offline watch is not a big deal anymore. Try the Pazu Netflix video downloader to enjoy Netflix streaming with ultimate customizations.
By Erika Leen - Jun 10, 2026
Explore the key features of Audials One for Netflix, how to record Netflix with Audials, and how to troubleshoot Audials Netflix not working problems. Maximize your viewing experience with ease.
By Erika Leen - Jun 4, 2026